
Paver Patio Installation: 7 Steps Homeowners Should Understand Before Building
A practical guide to paver patio installation, from planning and materials through excavation, base prep, laying pavers, joint sand, compaction, and maintenance.
QUICK ANSWER
Successful paver patio installation depends on the base, grade, and compaction more than the visible pavers.
The basic sequence is plan the patio, gather materials, clear and excavate the site, build and compact the base, lay the pavers, install edge restraint and joint sand, then compact and maintain the surface. Problems usually start when excavation, drainage, or base prep is rushed.
- Plan slope so water moves away from the house.
- Compact the base in layers instead of relying on loose aggregate.
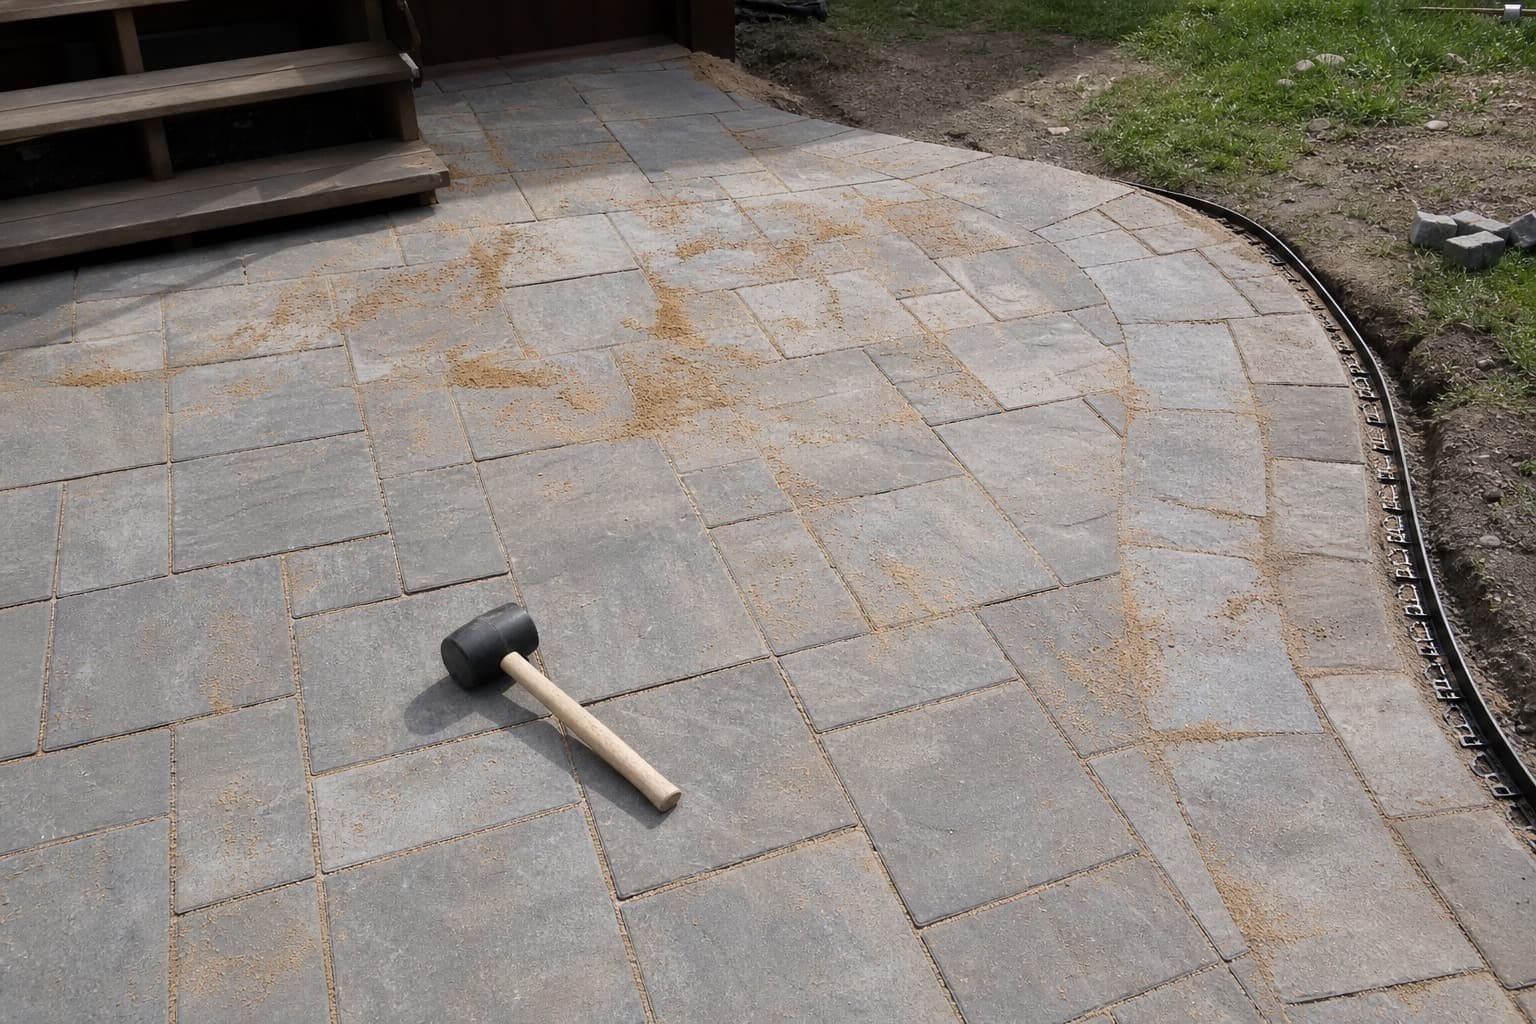
- Use edge restraint and joint sand so pavers stay locked together.
Use This Guide Before Deciding Whether to DIY or Hire the Patio
Paver patio installation looks simple at the surface, but long-term performance depends on planning, excavation, base depth, compaction, slope, edge restraint, and drainage before the first paver is set.
Best for
Homeowners researching how to install pavers, how to lay patio stones, or whether a DIY paver patio is realistic.
Primary handoff
Hardscaping and patios when the project needs professional base prep, drainage, layout, or finish work.
Key risk
Skipping base, slope, compaction, or edge restraint can cause settling, puddling, shifting, and uneven joints.
PROCESS
The seven installation steps to understand
1
Plan the location and layout
Decide size, furniture fit, traffic flow, house connection, drainage direction, and whether steps or walls are part of the scope.
2
Gather materials and tools
Pavers, base aggregate, bedding layer, edge restraint, joint sand, compactor access, levels, and cutting tools all affect the finished result.
3
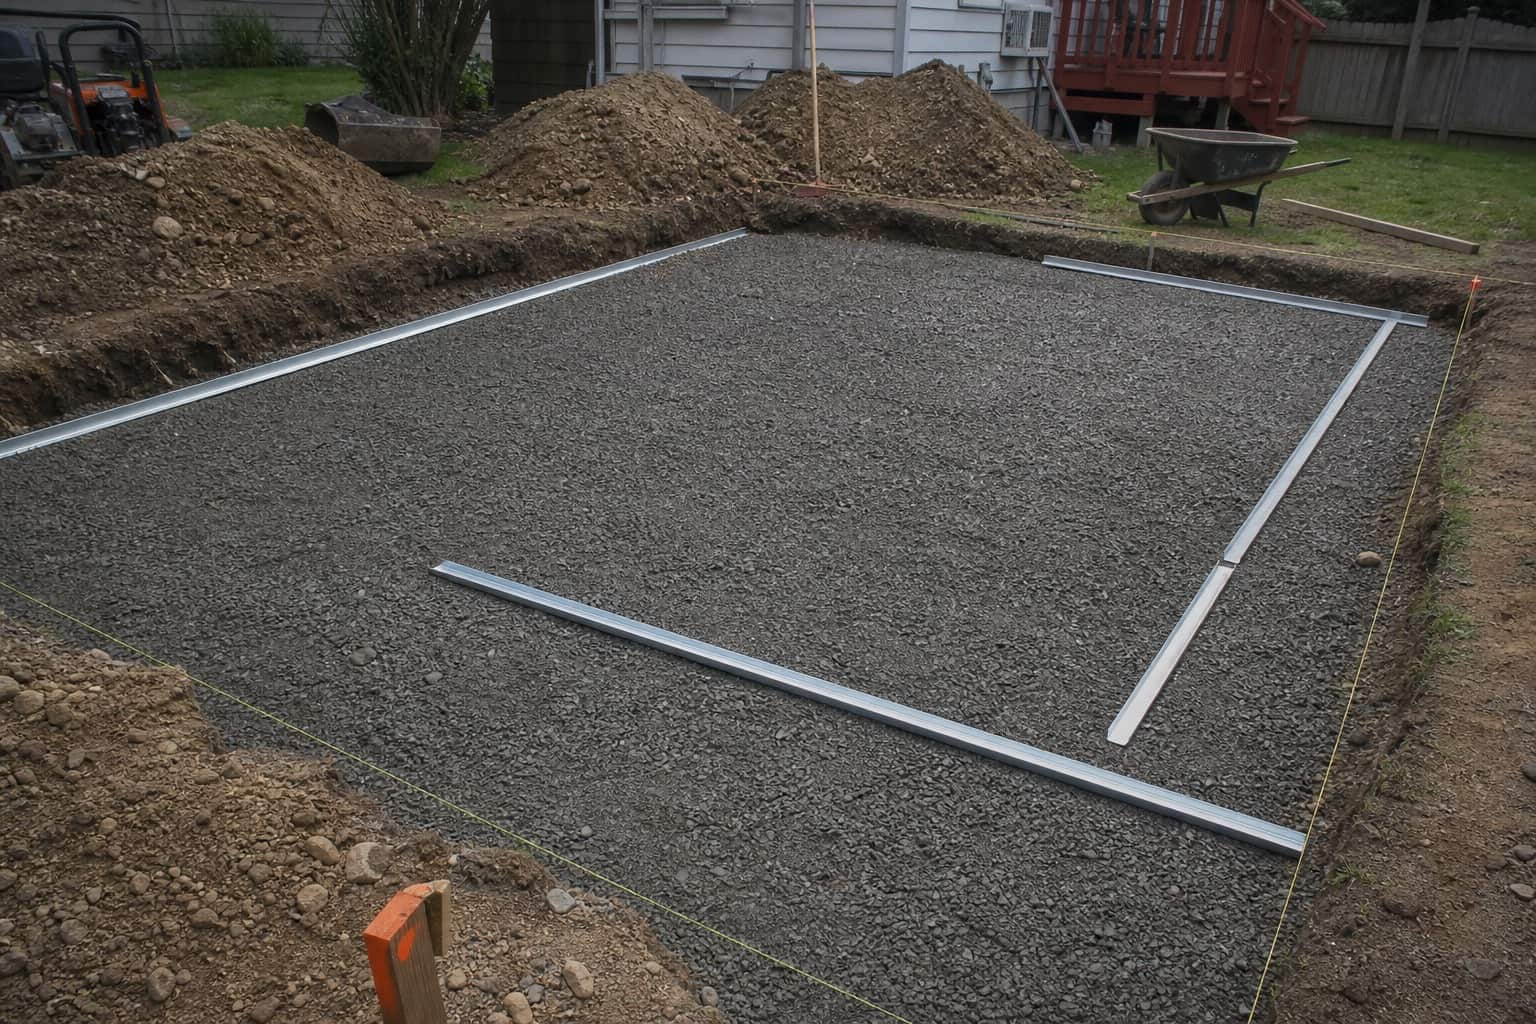
Excavate and grade the site
Remove the old surface and enough soil for base depth while setting a slope that moves water away from structures.
4
Build a compacted base
The base carries the patio. Layered aggregate, compaction, and stable edges are what help prevent settling and movement.
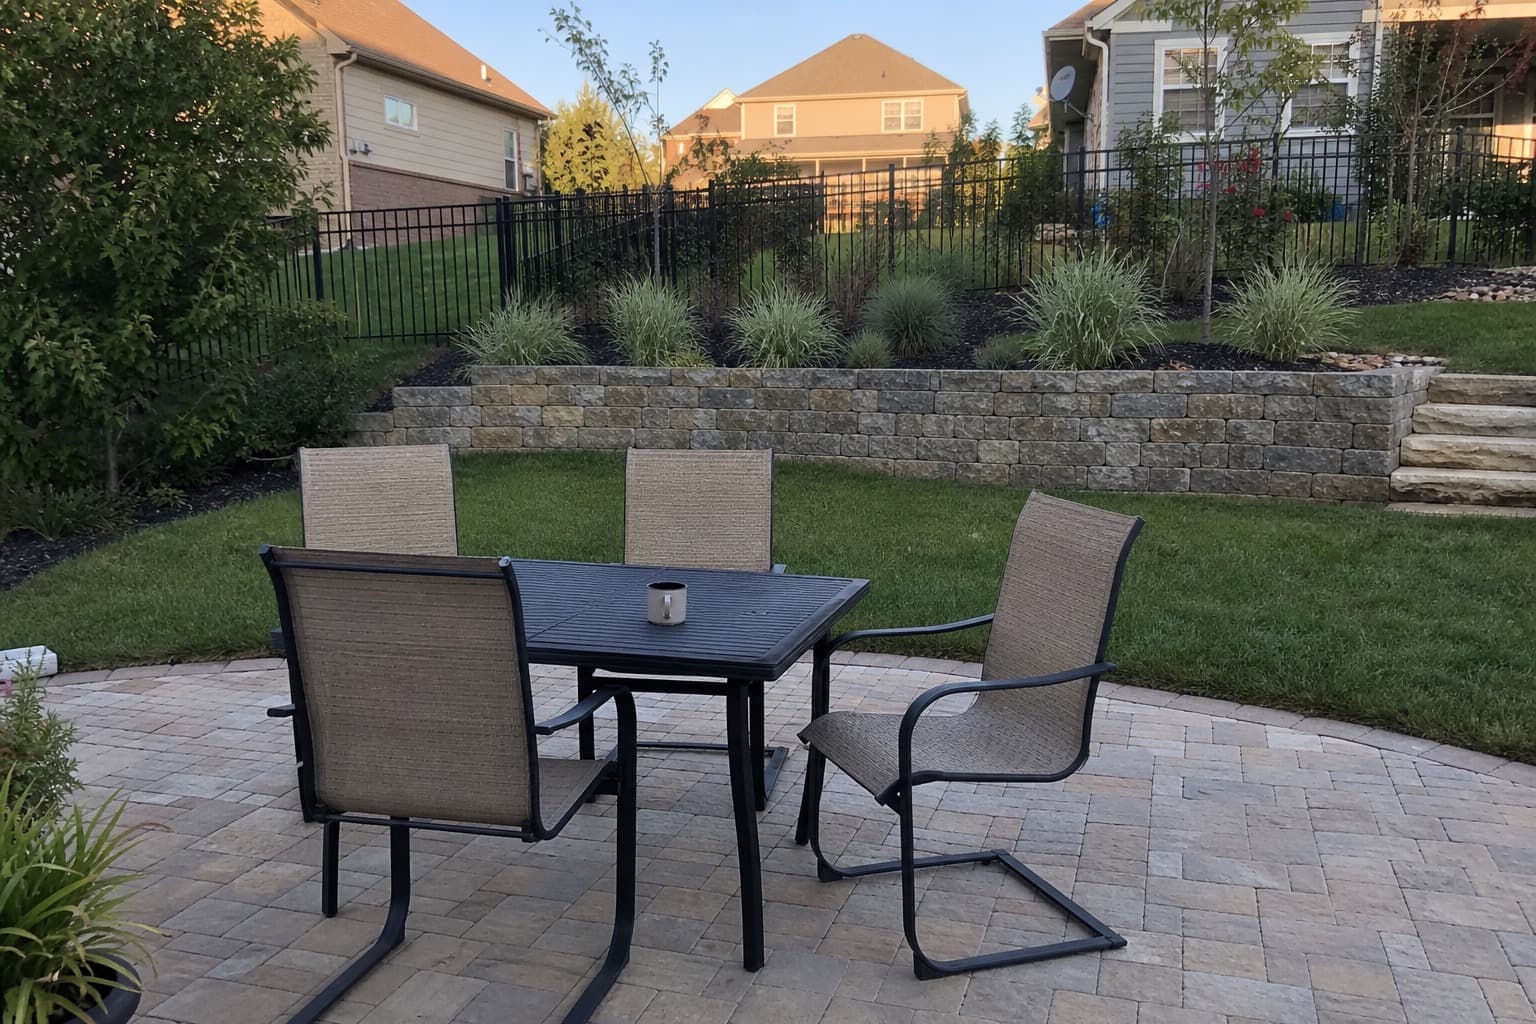
The visible finish depends on hidden prep
The patio surface only performs well when base, layout, edges, and joints work together.
Base prep
Excavation, grade, and compacted aggregate create the platform.
Paver layout
Pattern, cuts, and spacing determine the surface look and labor.
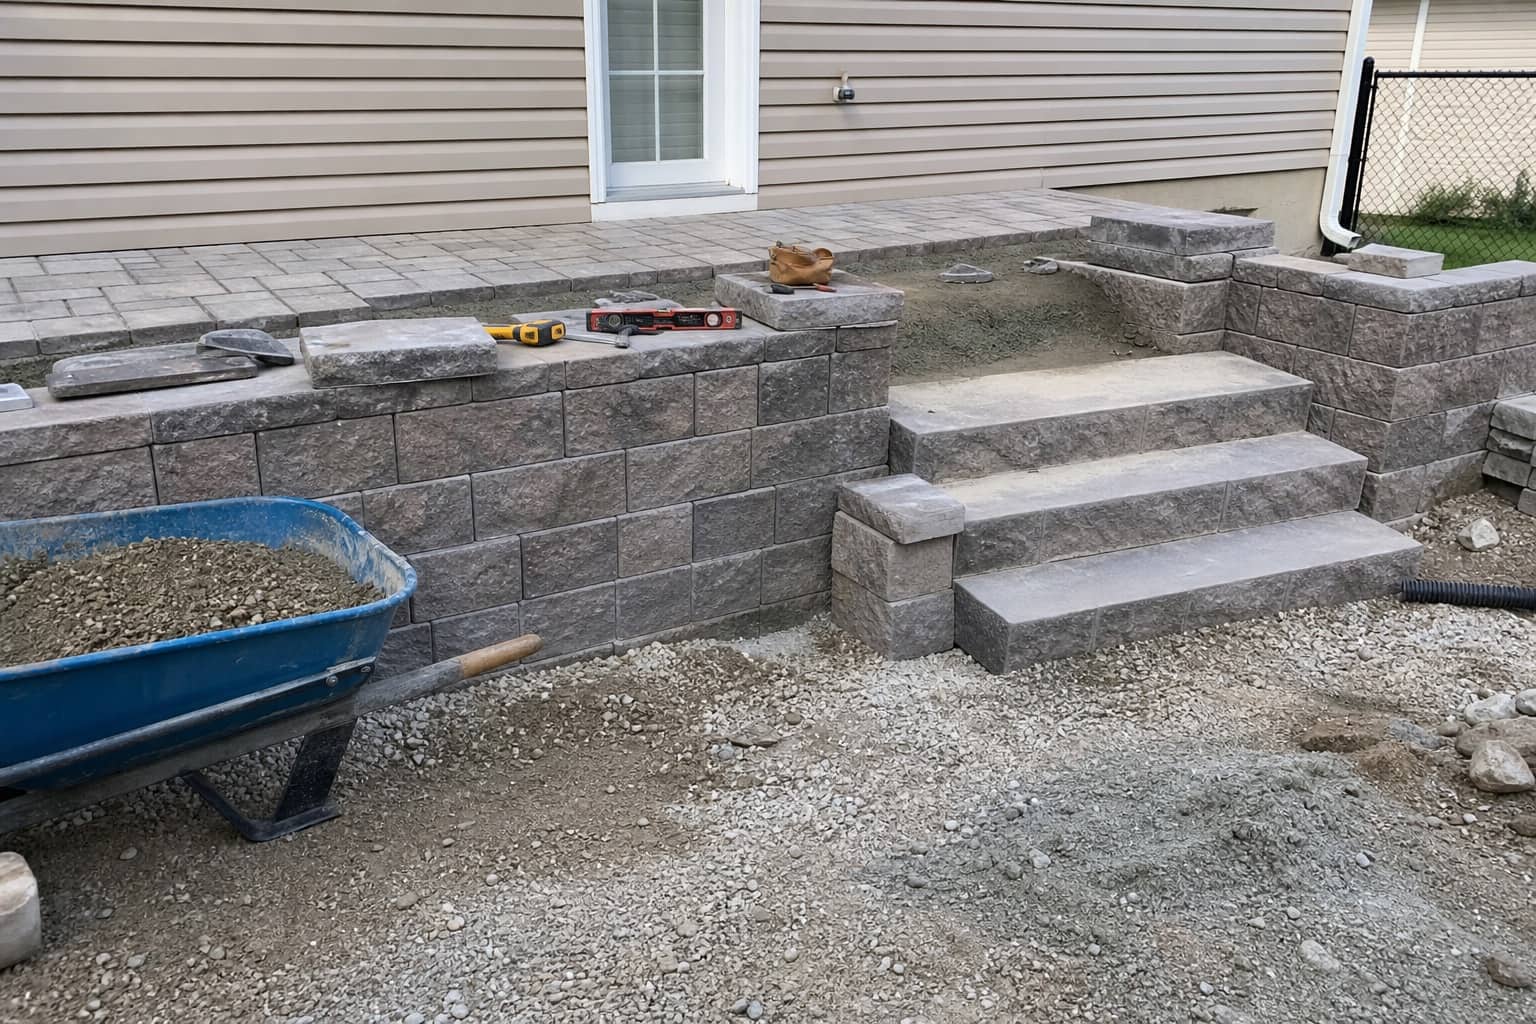
Add-ons
Steps, walls, and edges expand the installation beyond a flat patio.
THE SHORT VERSION
- Planning, grade, and base prep are the parts that decide whether a paver patio lasts.
- DIY paver patio projects are most risky when excavation depth, compaction, slope, or cutting is underestimated.
- Drainage, steps, sitting walls, and access should be scoped before installation begins.
INSTALLATION DRIVERS
What changes the difficulty of laying pavers
- Patio size
More square footage means more excavation, base material, pavers, cuts, and compaction passes.
A small grill pad is more manageable than a full dining and seating patio.
- Grade and drainage
The patio needs a planned slope and may need drainage fixes before installation.
Water running toward the house should be solved before pavers lock in the grade.
- Base depth
Soil conditions and use case determine how much base work the patio needs.
Soft or disturbed soil needs more care than a stable, well-drained area.
- Pattern and cuts
Borders, curves, transitions, and small pieces add installation time.
A simple rectangular pattern is easier than a curved patio with a detailed border.
- Access
Tight gates, long wheelbarrow routes, slopes, and staging limitations make the work harder.
Backyard access can change how material and equipment move through the site.
DIY OR PRO
When a DIY paver patio is realistic and when it is not
More DIY-friendly
Small, flat, accessible areas with simple shapes and no drainage issue.
- •Simple rectangle
- •Easy access
- •No steps
- •Clear slope
More pro-worthy
Patios that need excavation depth, compaction, accurate grading, cuts, or structural edges.
- •Larger surface
- •Drainage concern
- •Steps or walls
- •Complex pattern
Needs design first
Outdoor living spaces tied to seating, lighting, walls, planting beds, and traffic flow.
- •Multiple zones
- •Furniture fit
- •Lighting
- •Planting integration
HANDOFF
Which patio path fits your project?
If
You are researching the basic process and the area is small and flat.
Then
Use this guide to understand the installation sequence before deciding whether DIY is realistic.
RELATED GUIDE
Cost factors help compare DIY savings against professional scope.
Read patio cost guideIf
The patio affects water flow, the house foundation, or a low spot.
Then
Solve drainage and grade before installing pavers.
FIX FIRST
Patio performance depends on water moving correctly.
See drainageIf
The patio includes steps, sitting walls, lighting, or outdoor living features.
Then
Request a hardscaping estimate so the full scope is coordinated.
BEST NEXT STEP
This is broader patio-led hardscaping work.
See hardscapingREQUEST READY
What to know before asking for paver patio installation
Dimensions and use
Share the size or the furniture, grill, fire pit, or seating you want to fit.
Current surface
Say whether the area is grass, old concrete, gravel, mud, or an existing patio.
Water behavior
Mention puddles, runoff, downspouts, or water moving toward the house.
Add-ons
Include steps, sitting walls, lighting, borders, walkways, or planting bed edges.
Access
Show gates, side yards, slopes, stairs, and where materials could be staged.
Related Proof for Paver Patio Installation
Use these pages when installation research should become hardscaping, drainage, wall, or cost planning.


Continue With the Right Patio Planning Path
Use these pages after deciding whether your patio is a simple surface, a drainage issue, or a broader outdoor living scope.
Paver Patio Installation FAQs
Short answers for homeowners researching paver patio installation before building or requesting an estimate.
What is the most important part of paver patio installation?
Base prep, grade, and compaction are the most important parts. The pavers you see depend on the hidden base staying stable.
Can I install a paver patio myself?
A small, flat, simple patio may be realistic for some homeowners. Larger patios, drainage issues, steps, walls, complex cuts, or poor access usually make professional installation the safer path.
Should I handle drainage before laying pavers?
Yes. Water movement should be planned before installation so the patio does not trap water, settle, or send runoff toward the house.
Still have questions? We're happy to walk through your project.
Ready to move from patio research to a scoped installation estimate?
Send photos, rough dimensions, access details, desired use, and any drainage or grade concerns so Orlando's can confirm the right hardscaping path.